To access the Infobase CMS, go to either www.cms.infobase.com or www.mms.infobaselearning.com and log in using the username and password you've been given.
Chrome and Firefox perform best as your browser when working in the CMS, but IE or Safari should also be fine.
When you log in, you should see the articles that have been assigned to you. You may review these without putting them into edit, or you may edit to update them. Click the record title to enter it. Using the "Mark as Reviewed" option is an efficient way to indicate you have confirmed an entry is fine as is, for instance definition records or other entries that do not change. When you mark a record as reviewed, it does not then have to be approved. If an entry does in fact need edits to update or improve, click the pencil icon in the top right corner to enter edit screen, where you can write your text and/or make changes to existing text.
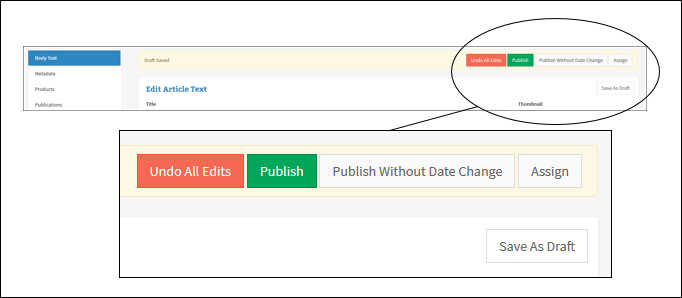
Once you begin editing the article, the CMS will auto-save your work periodically, but it's a good idea to save it yourself every few minutes, especially if you are writing a lot of text. (The "Save As Draft" button is at the top right. Clicking this will take you out of edit mode, so click on the pencil icon again to continue editing.)
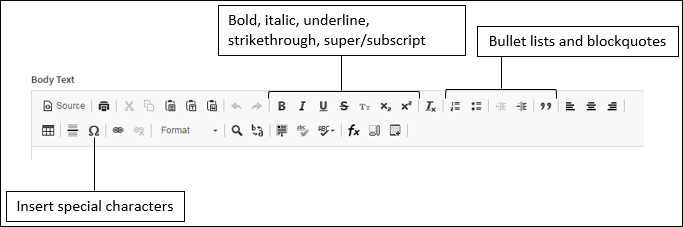
You should also use the menu across the top of the text editor to format text as bold, italic, underlined, or superscript/subscript; add a bullet list, blockquote, or table; or insert a symbol or special character.
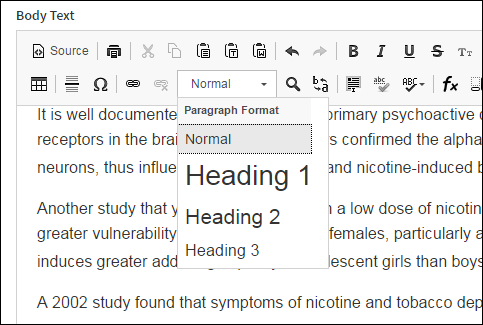
To format subheads, please use the drop-down that's second from the left. (It will default to "Normal.") Don't simply make them bold. Do not use "Heading 1". In the text, A heads should be Heading 2, B heads should be Heading 3, and so on.
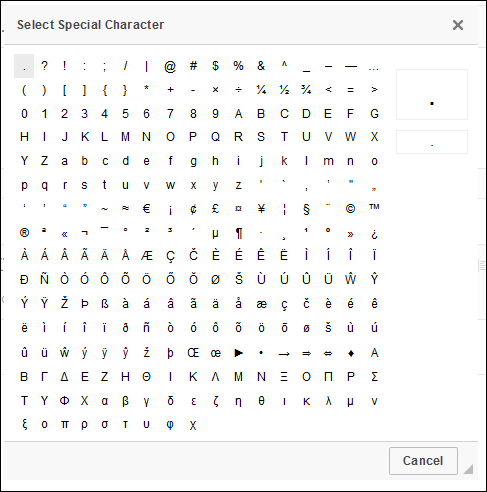
Please use the “insert special character” function for any symbol or character that doesn’t appear on your keyboard – for example: em dashes, en dashes, ellipses, and letters with accent marks.
If your text includes a reference to a website (for example, in the Further Information section of an article or a Bibliography), the URL should be text ONLY, not a live link to the site. Therefore, if you are pasting it in from another source, make sure the URL does not have hyperlink code attached to it. (If it does, it will typically be underlined and clickable in your source.) You can ensure that this code does not get added by pasting as plain text (see: Populating Text Fields from Existing Files), and you will know that the live link did not get included because the pasted text will look exactly like the rest of your text, i.e., not blue or underlined.
To avoid issues with your links in the CMS and being pulled into ePubs, do not use the link button in editor to add or change a link.
Web addresses may be styled with or without the http://. (e.g., http://www.nytimes.com or www.nytimes.com). Please do not include any URLs for content that is behind a paywall.
Saving and Submitting Your Work
Once you are done editing the article, you’ll need to save and publish your edits by clicking one of the options at the top of the edit page. As a Writer, you can either click "Save As Draft" to come back and finish editing later, "Undo All Edits" to return record to how it was when assigned to you, and "Submit for Approval" to complete your edits and send record back to your Editor for review. Writers will not be able to make further changes. Once they have sent for approval, if more changes are required, the article will need to be reassigned or the changes rejected by the Editor. (Editors can approve or modify their own changes to a given article.)
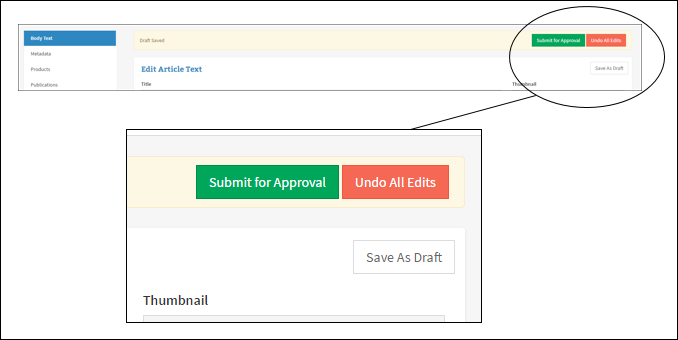
As an Editor, you can additionally click "Assign" to assign article to another Editor or Writer, click "Publish" to publish edits and change "Last Modified" date for the record, or click "Publish without Date Change" to publish edits without changing the last modified date for the record.